Update 31st January 2025: Please be aware that the VMware Documentation site has been migrated to it's new home at Broadcom TechDocs. As a result of this, I have been informed that some external links in this site no longer function correctly. If you do find a broken link before it is replaced, please reach out via social media and let me know!
Warning! The content within this article is over 36 months old and, therefore, may be out of date.
HOWTO: Install the VMware vRealize Automation 6.x IaaS Components (Simple Install)
Share this article on:


VMware vRealize Automation VCAP6 VCAP6-CMA
Published on 12 January 2017 by Christopher Lewis. Words: 430. Reading Time: 3 mins.
Introduction
This post is a part of a series of posts for preparation for the VCAP6-CMA Deploy exam. For the full exam prep resources check here .
Prerequisites
- Deploy a Windows Virtual Machine to be used as a IaaS Server.
- Install and Configure the VMware vRealize Automation IaaS Prerequisites
- Configure Service Account permissions in SQL Server
- Download the IaaS Installer from the VMware vRealize Automation Appliance
Configuration Overview
The high level configuration steps for this are:
- Log onto the IaaS Server as the vRealize Automation Service Account.
- Install VMware vRealize Automation IaaS.
Install VMware vRealize Automation IaaS
- Locate the IaaS Installer (
setup_cx-vra-601.thecloudxpert.local@5480.exe) and right-click and select Run as Administrator.
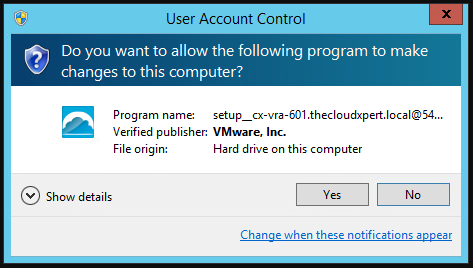
- If prompted by a User Account Control dialog, click Yes.
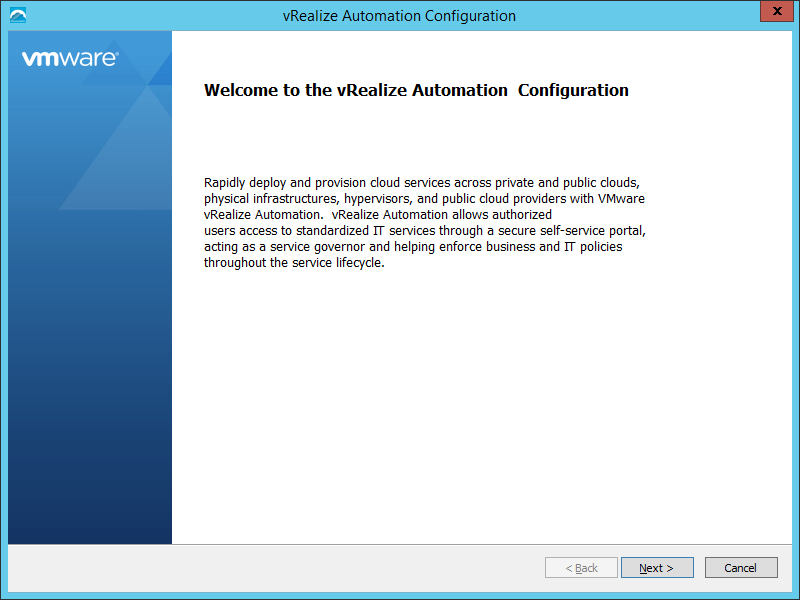
- Click Next.
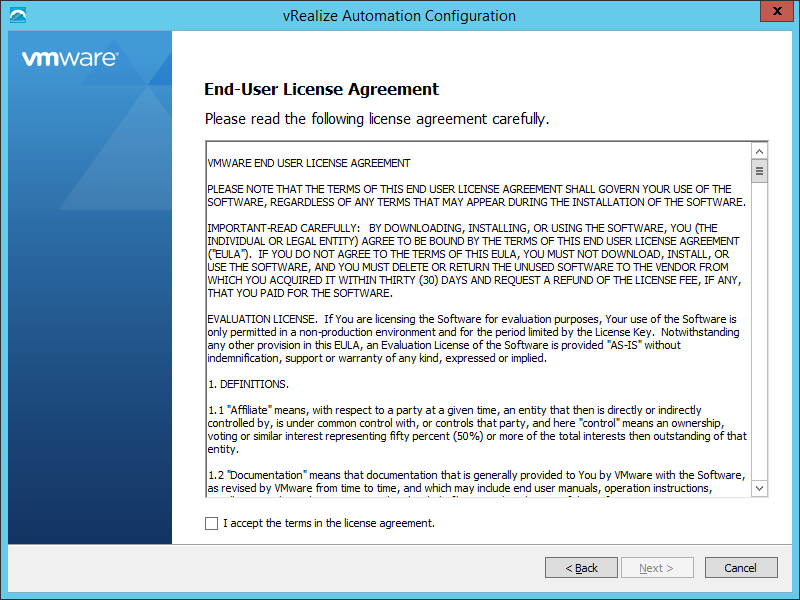
- Check the I accept the terms in the license agreement checkbox and click Next.
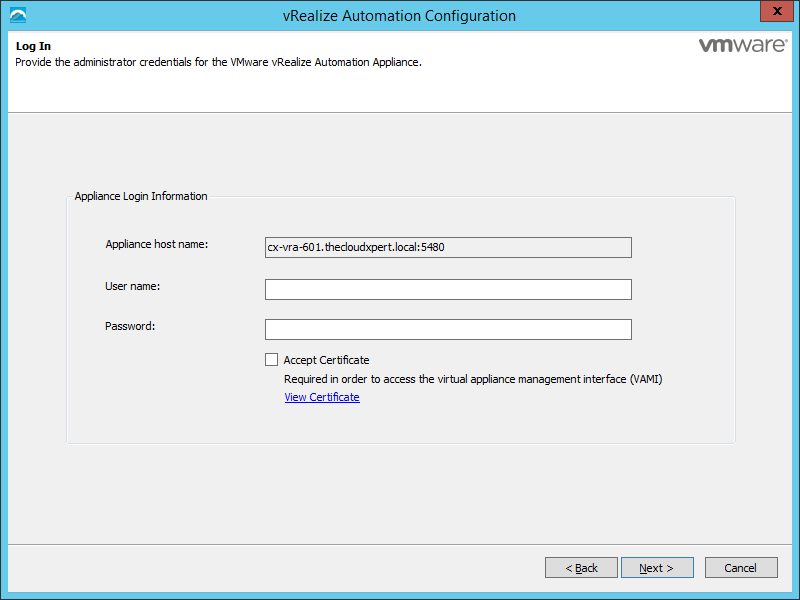
- Enter the root credentials (Username and Password) of the vRealize Automation Appliance (where you downloaded this IaaS installer from) and check the Accept Certificate checkbox.
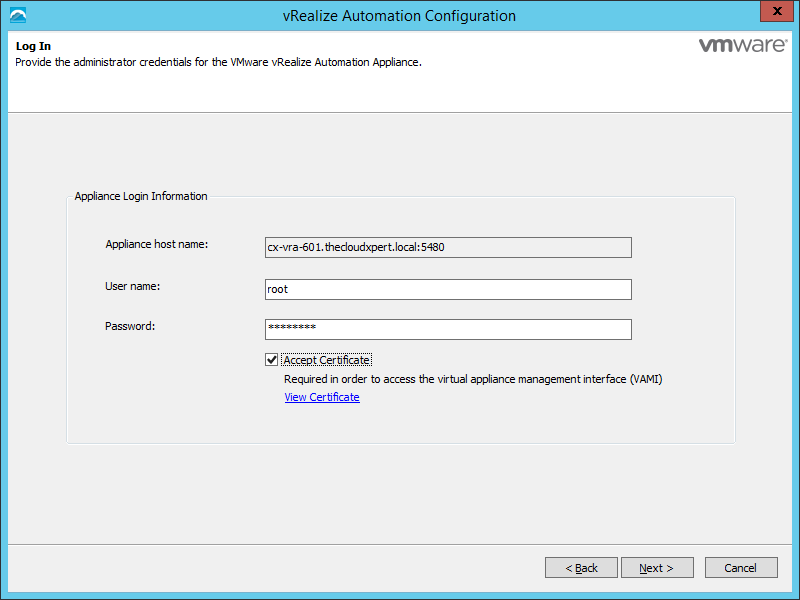
- Click Next.

- Select the Complete Install option and click Next.
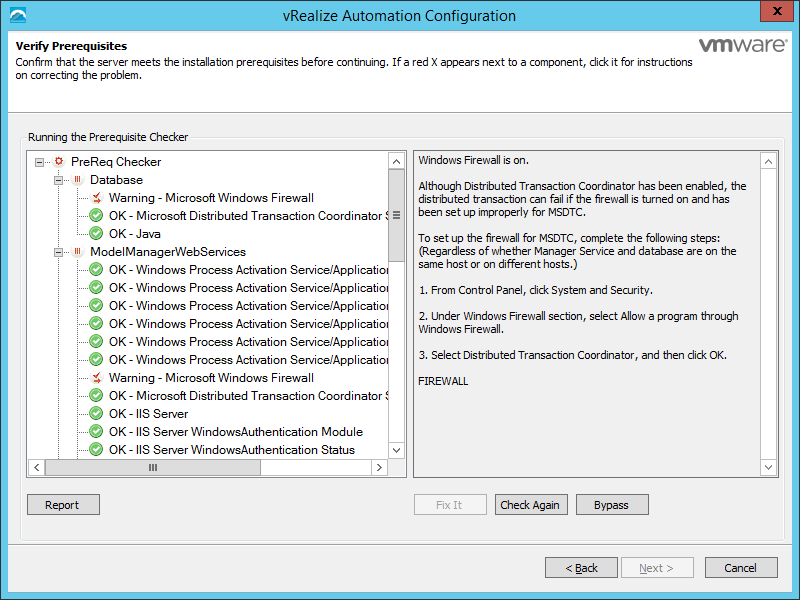
- Check to ensure the prerequisites have all been completed and click Next.
Note:
You will see that the Next button is still greyed out and a Windows firewall warning exists regarding the firewall ports for MSDTC. As I know I have completed this configuration, I can safely click Bypass before I can click Next.
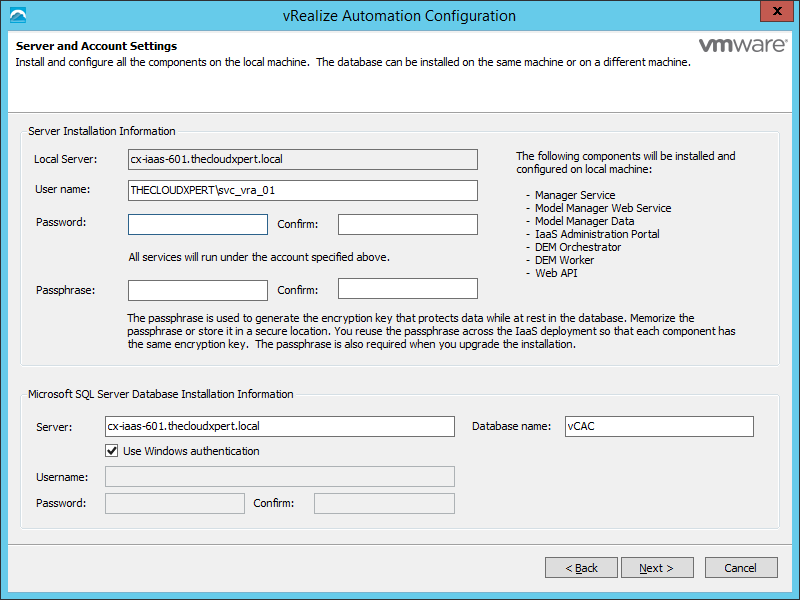
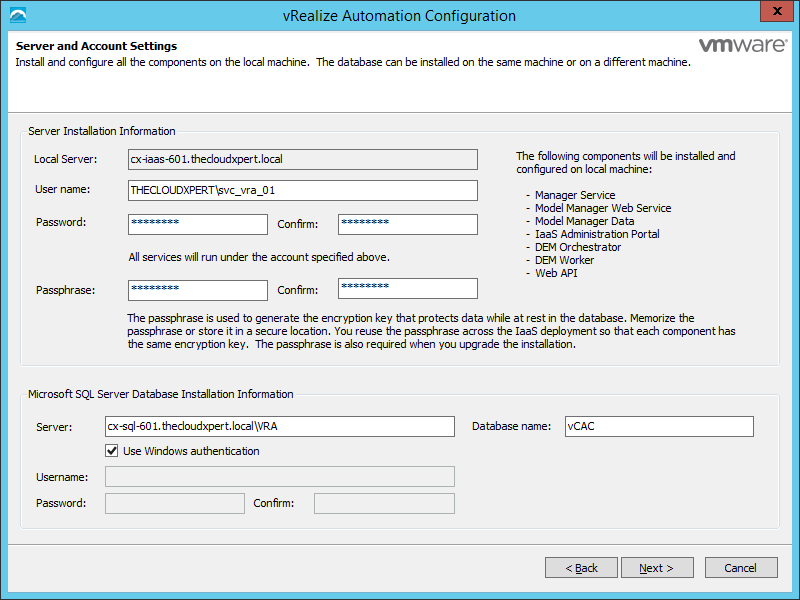
- Enter the Password for the vRealize Automation Service Account (this should be automatically populated as it should be the currently logged on user), enter and confirm a Passphrase for the encryption at rest for the IaaS Database, and then confirm (and update where necessary) the information on the SQL Server.
Note:
My SQL server uses a named SQL Instance called VRA.
- Click Next.

- Change the information on this screen as appropriate to meet any naming standards/conventions and then click Next.
Note:
If you do not want to install a vSphere Agent at this time then uncheck the Install and configure vSphere agent checkbox.
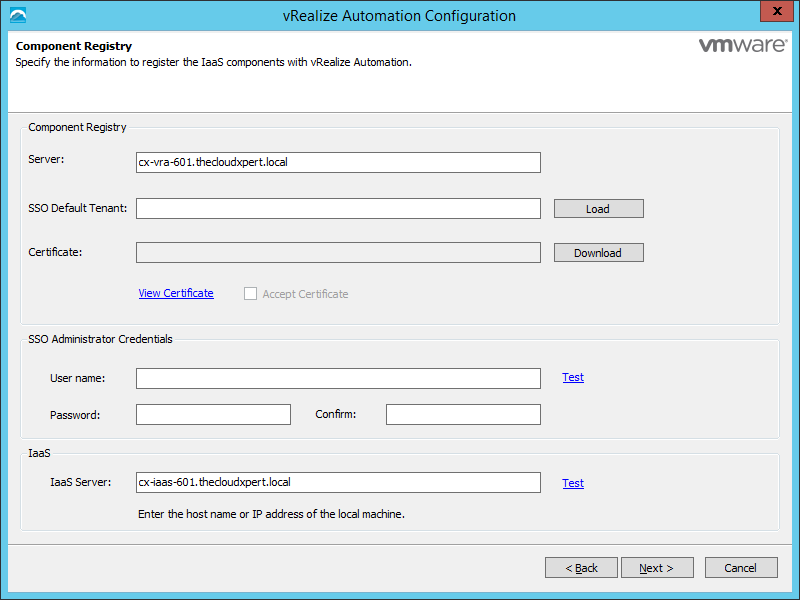
- Complete the following:
- Click Load to update the SSO Default Tenant text box with the name of the default tenant, vSphere.local
- Click Download to download the certificate from the vRealize Automation Appliance.
- Check the Accept Certificate checkbox
- Enter administrator@vsphere.local into the User Name textbox, enter (and confirm) the password for the account, then click Test.
- Confirm the FDQN in the IaaS Server name text field is correct and click Test.
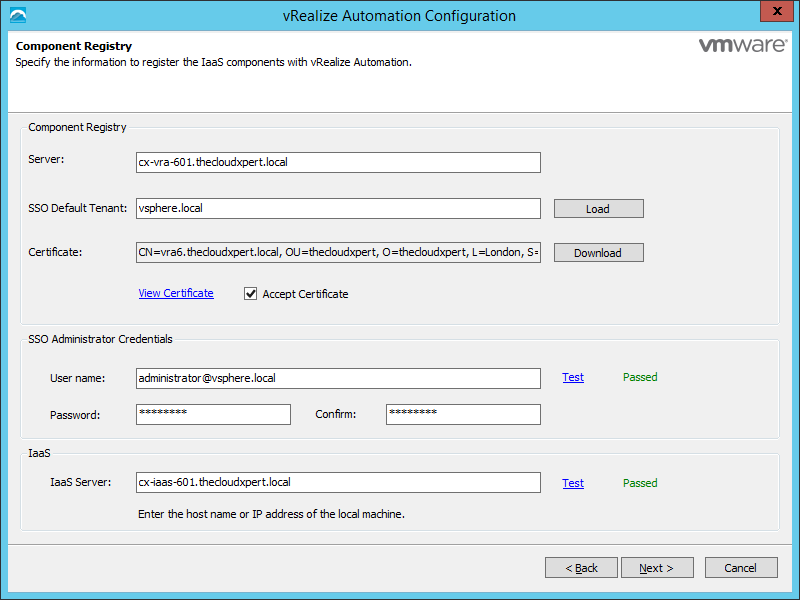
- Click Next.
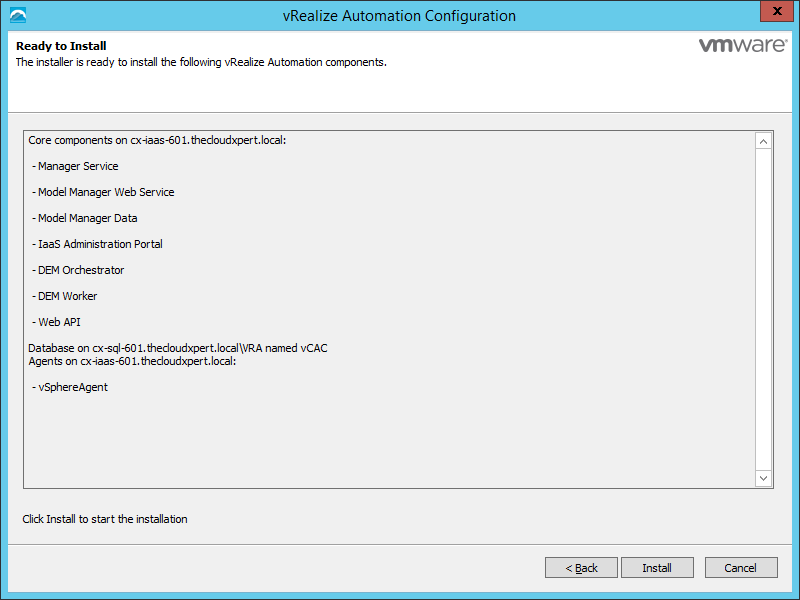
- Click Install.

- Click Next.
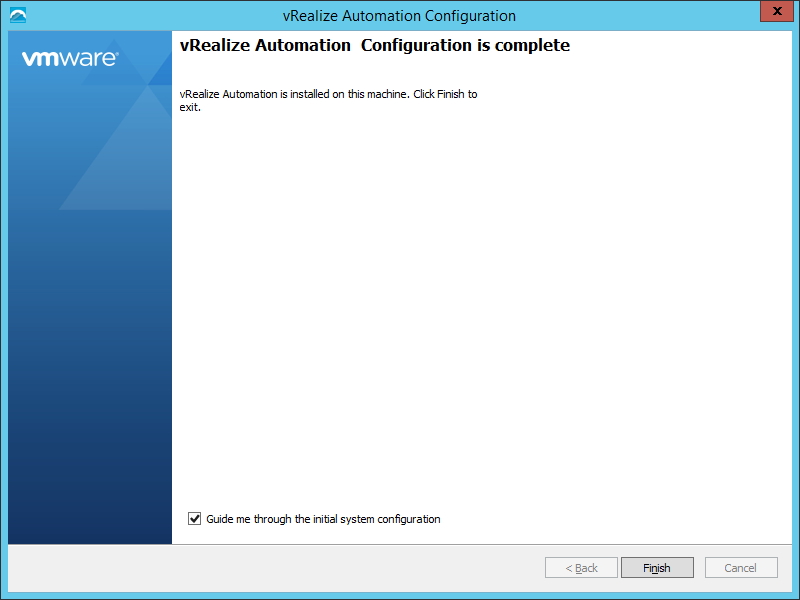
- Uncheck the Guide me through the initial system configuration checkbox and click Finish.
There we have the installation of vRealize Automation IaaS in an all-in-one simple/rainpole configuration!
Published on 12 January 2017 by Christopher Lewis. Words: 430. Reading Time: 3 mins.
Share this article on:
Related Post(s):
- HOWTO: Install the VMware vRealize Automation 6.x IaaS Prerequisites ()
- VCAP6-CMA Deploy - Objective 1.1: Deploy and Manage a vRA Appliance and IaaS Server as Single nodes ()
- HOWTO: Configure the VMware vRealize Automation 6.x Appliance (Minimal Deployment) ()
- HOWTO: Deploy the Identity Appliance for vRealize Automation 6.x ()
- HOWTO: Configure the VMware Identity Appliance for vRealize Automation 6.x ()
Recent Posts:
Blog Categories:
active directory 6
aria automation 9
aria automation orchestrator 1
aria operations 2
aws 2
blog 1
career 1
certificate authority 5
certificates 5
certification 91
cloud management 1
cloudnativecon 1
community 1
fun 1
general 9
hands on labs 1
home lab 2
kubecon 1
kubernetes 1
microsoft 7
nsx 45
nsx v 41
powercli 8
powershell 6
reviews 1
vcap 48
vcap6 2
vcenter 4
vcix 2
vexpert 9
vmug 5
vmware 99+
vmware aria 1
vmware aria automation 9
vmware aria automation orchestrator 1
vmware aria operations 3
vmware cloud 3
vmware cloud director 1
vmware explore 2
vmware identity manager 2
vmworld 36
vrealize automation 80
vrealize automation saltstack config 1
vrealize business 2
vrealize log insight 1
vrealize operations 1
vrealize operations manager 5
vrealize orchestrator 13
vrealize suite 14
vrealize suite lifecycle manager 20
vsan 5
vsphere 9
windows 6
Top Tags:
active directory 6
api 18
barcelona 24
certificates 11
certification 7
howto 33
microsoft 7
multi tenancy 9
nsx v 43
platform services controller 8
powercli 8
powershell 7
psc 6
vcap 9
vcap6 45
vcap6 cma 48
vcap6 nv 37
vcix6 nv 36
vexpert 19
vmug 8
vmware 99+
vmware aria 10
vmware aria automation 9
vmworld 35
vmworld 2016 13
vmworld 2017 9
vra 13
vrealize automation 74
vrealize operations 8
vrealize orchestrator 21
vrealize suite lifecycle manager 11
vrslcm 20
vsan 7
vsphere 12