Update 31st January 2025: Please be aware that the VMware Documentation site has been migrated to it's new home at Broadcom TechDocs. As a result of this, I have been informed that some external links in this site no longer function correctly. If you do find a broken link before it is replaced, please reach out via social media and let me know!
Warning! The content within this article is over 36 months old and, therefore, may be out of date.
HOWTO: Configure a vRealize Automation 6 Advanced Services Endpoint for vCenter Server
Share this article on:


VMware vRealize Automation vRealize Orchestrator VCAP6 VCAP6-CMA
Published on 7 February 2017 by Christopher Lewis. Words: 244. Reading Time: 2 mins.
Introduction
This post is a part of a series of posts for preparation for the VCAP6-CMA Deploy exam. For the full exam prep resources check here .
In this post we are covering the configuration of the Advanced Services Endpoint for vCenter Server.
Prerequisite Steps
- A fully deployed vRealize Automation implementation.
- An external Orchestrator deployment (see HOWTO: Deploy the vRealize Orchestrator 6.x Appliance for vRealize Automation )
Step by Step Guide
- Navigate to and Log into the vRealize Automation Tenant Portal as a Tenant Administration user.
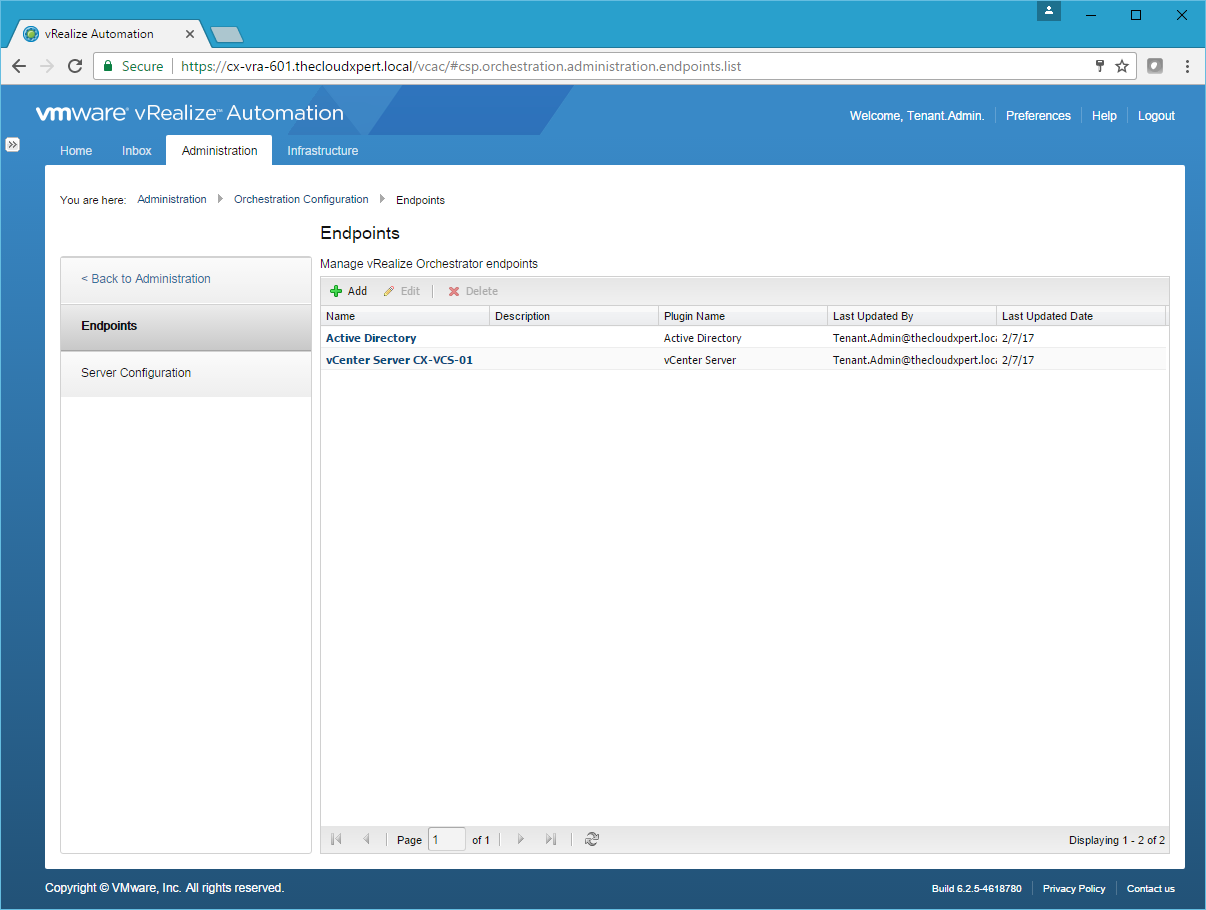
- Navigate to Administration > Orchestration Configuration > Endpoints.
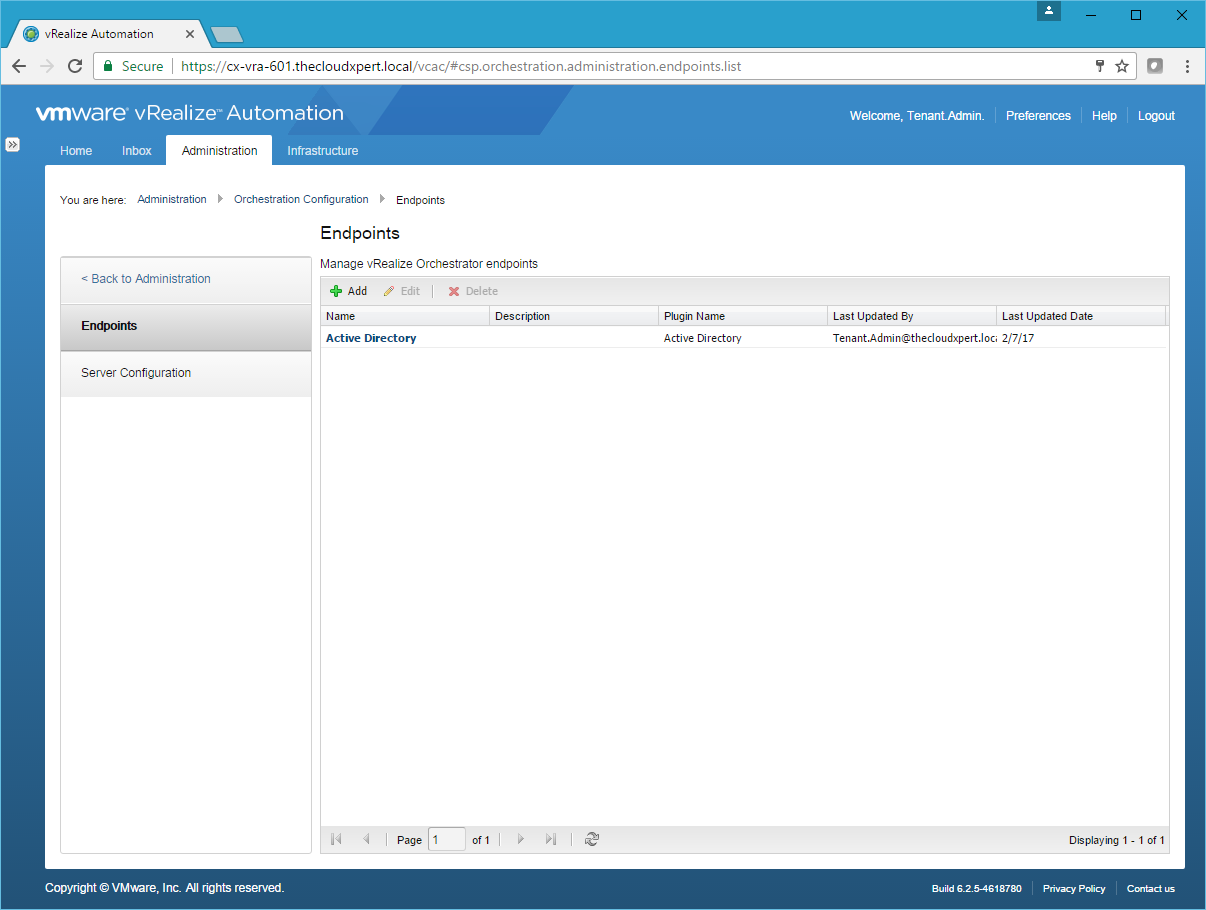
- Click Add.

Note:
You will only get the Active DIrectory plug-in warning if you have already configured that plug-in.
- Select vCenter Server from the Plug-in dropdown.
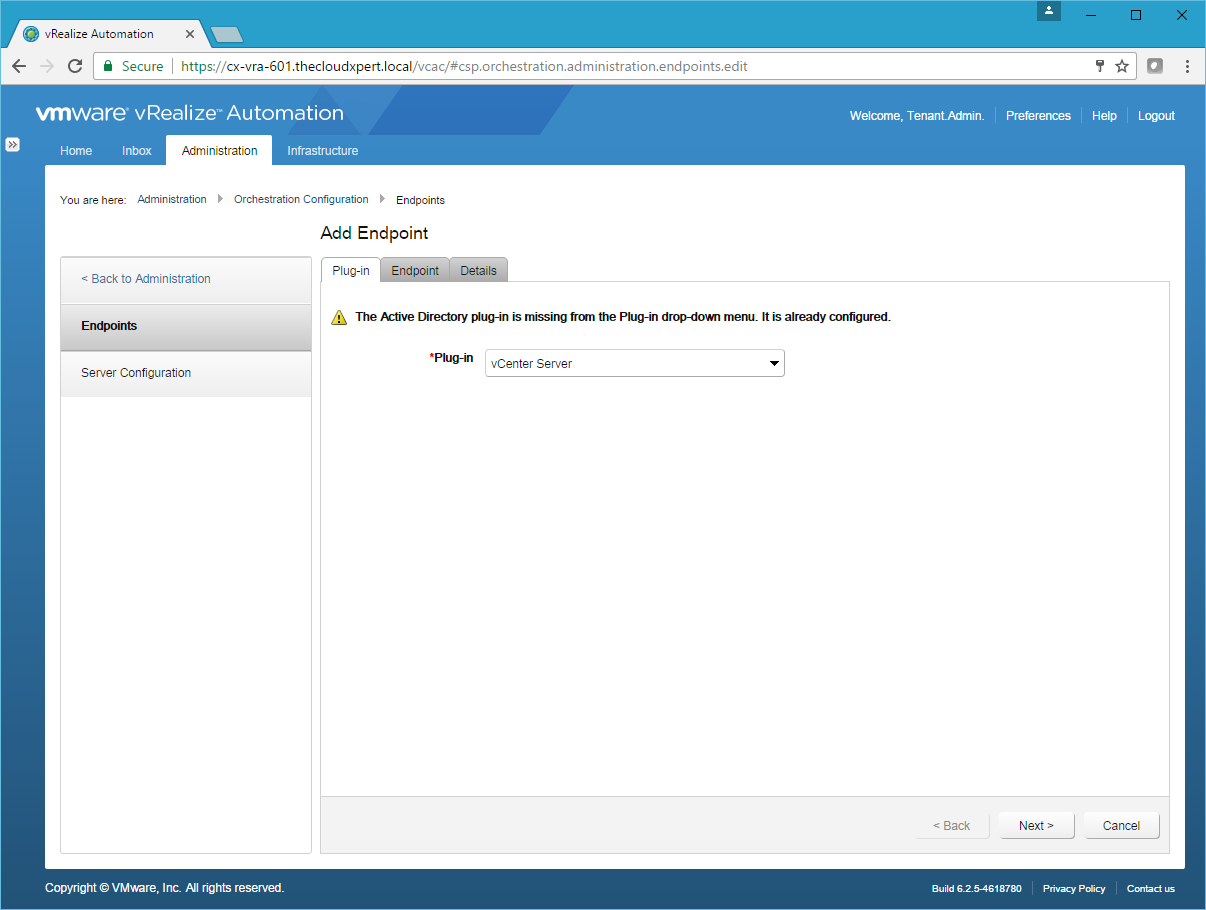
- Click Next.

- Type the Name of the endpoint into the Name text field and (optionally) provide a Description.
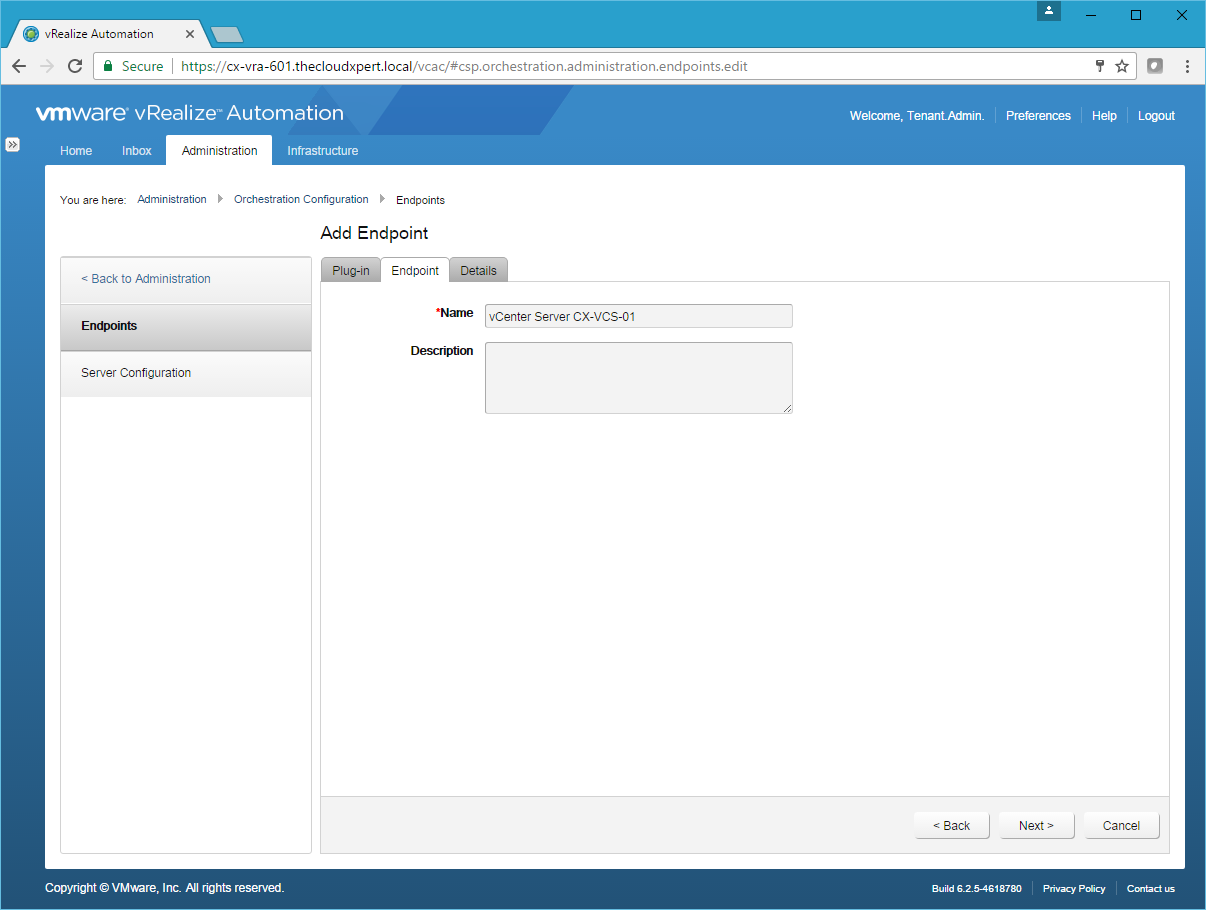
- Click Next.
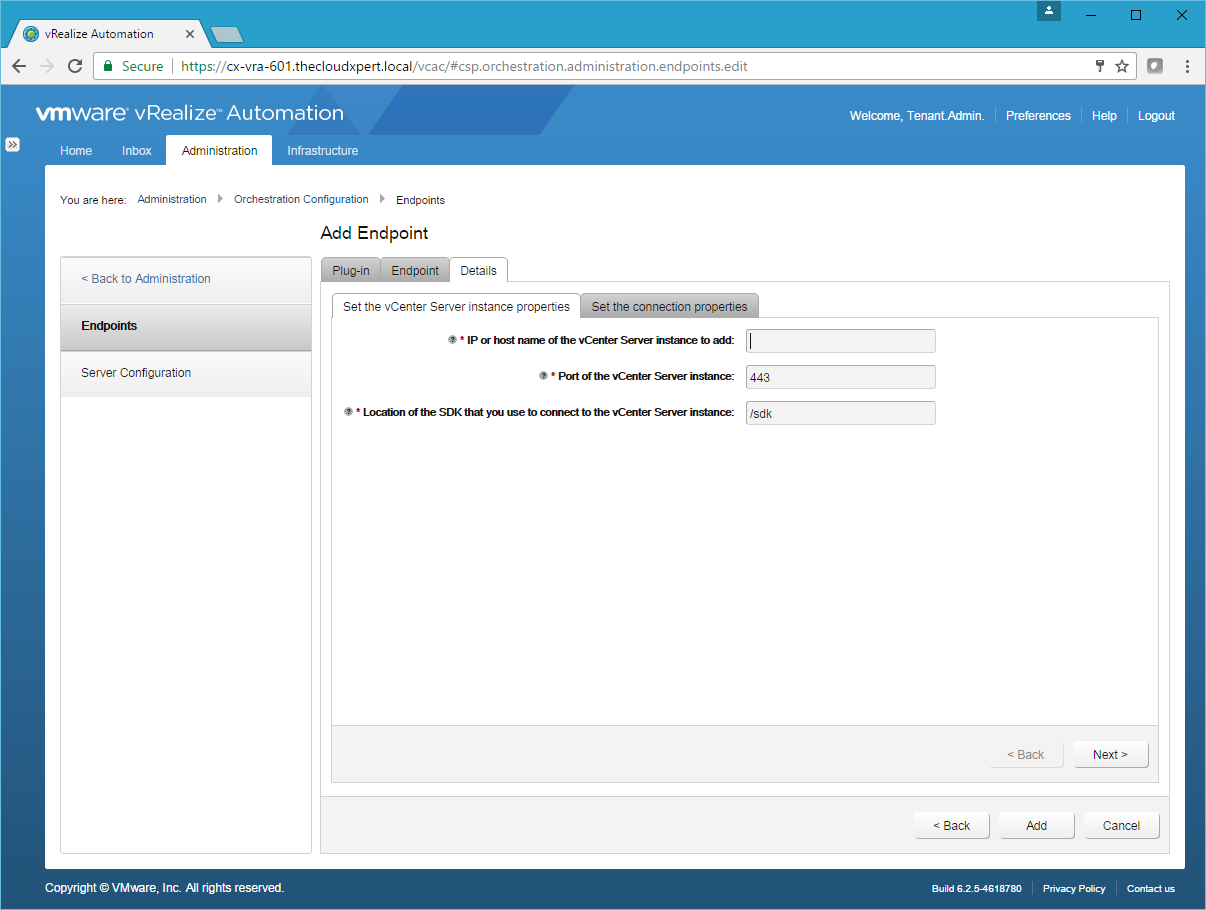
- Type the FQDN of the vCenter Server into the IP or host name of the vCenter Server instance to add text field. Leave all other settings as their defaults.
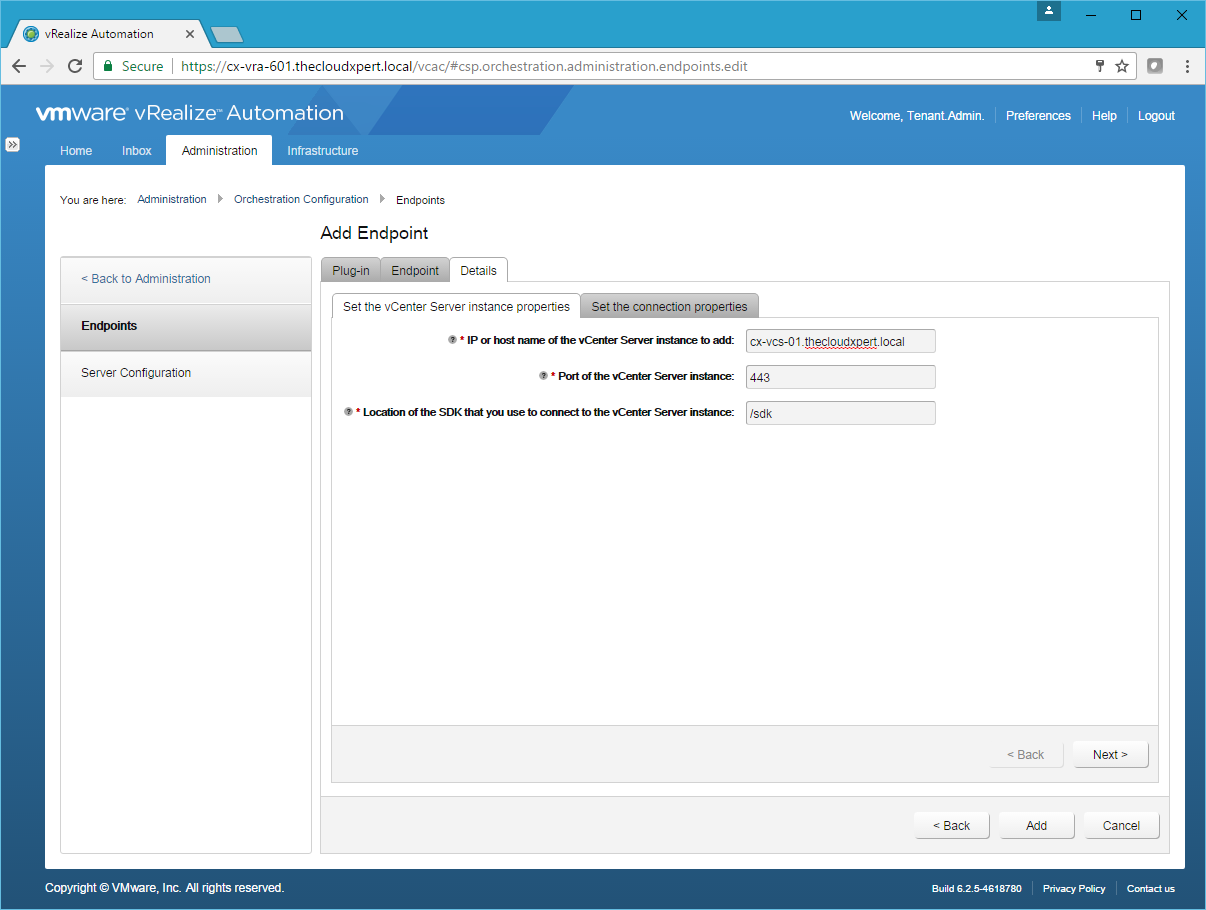
- Click Next.
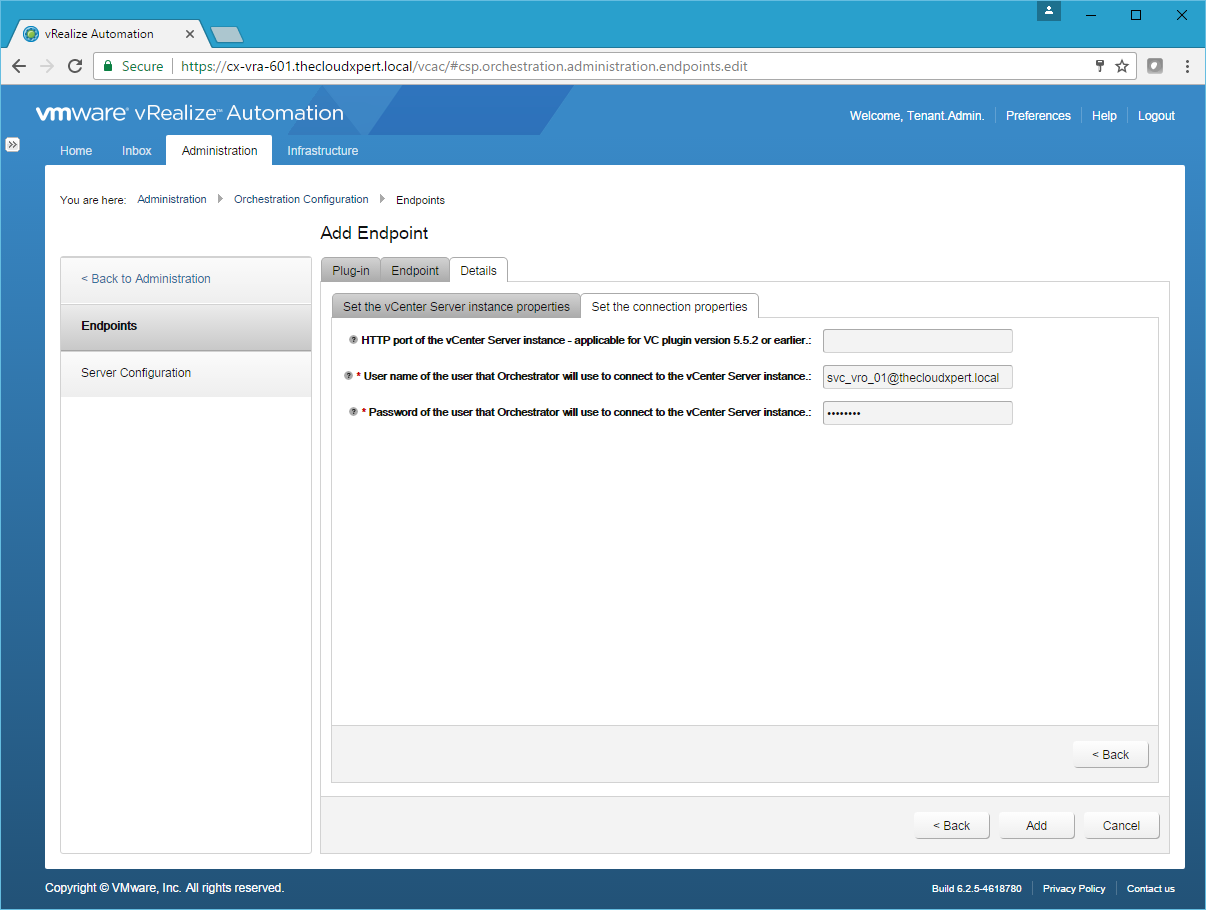
- Enter the Username and Password of a user that Orchestrator can use.
Note:
The user must be a valid user with privileges to manage vCenter Server extensions and a set of custom defined privileges.
- Click Add.
Note:
If you have already configured vRO to connect to vCenter using the Add a vCenter Server Instance workflow, you will get an error. You can run the Remove a vCenter Server Instance workflow and then retry.
Published on 7 February 2017 by Christopher Lewis. Words: 244. Reading Time: 2 mins.
Share this article on:
Related Post(s):
- VCAP6-CMA Deploy - Objective 6.1: Configure Advanced Service Designer ()
- HOWTO: Configure a vRealize Automation 6 Advanced Services Endpoint for Active Directory ()
- HOWTO: Deploy the vRealize Orchestrator 6.x Appliance for vRealize Automation ()
- VCAP6-CMA Deploy - Objective 5.2 - Modify a Blueprint to invoke a Workflow during a Lifecycle Change ()
- VCAP6-CMA Deploy - Objective 4.3: Manage Custom Properties and Build Profiles ()
Recent Posts:
Blog Categories:
active directory 6
aria automation 9
aria automation orchestrator 1
aria operations 2
aws 2
blog 1
career 1
certificate authority 5
certificates 5
certification 91
cloud management 1
cloudnativecon 1
community 1
fun 1
general 9
hands on labs 1
home lab 2
kubecon 1
kubernetes 1
microsoft 7
nsx 45
nsx v 41
powercli 8
powershell 6
reviews 1
vcap 48
vcap6 2
vcenter 4
vcix 2
vexpert 9
vmug 5
vmware 99+
vmware aria 1
vmware aria automation 9
vmware aria automation orchestrator 1
vmware aria operations 3
vmware cloud 3
vmware cloud director 1
vmware explore 2
vmware identity manager 2
vmworld 36
vrealize automation 80
vrealize automation saltstack config 1
vrealize business 2
vrealize log insight 1
vrealize operations 1
vrealize operations manager 5
vrealize orchestrator 13
vrealize suite 14
vrealize suite lifecycle manager 20
vsan 5
vsphere 9
windows 6
Top Tags:
active directory 6
api 18
barcelona 24
certificates 11
certification 7
howto 33
microsoft 7
multi tenancy 9
nsx v 43
platform services controller 8
powercli 8
powershell 7
psc 6
vcap 9
vcap6 45
vcap6 cma 48
vcap6 nv 37
vcix6 nv 36
vexpert 19
vmug 8
vmware 99+
vmware aria 10
vmware aria automation 9
vmworld 35
vmworld 2016 13
vmworld 2017 9
vra 13
vrealize automation 74
vrealize operations 8
vrealize orchestrator 21
vrealize suite lifecycle manager 11
vrslcm 20
vsan 7
vsphere 12